
Product Selection
Specifications & Fit
Electric Guitar String Length: A Locking-Tuner and OEM Fit Guide
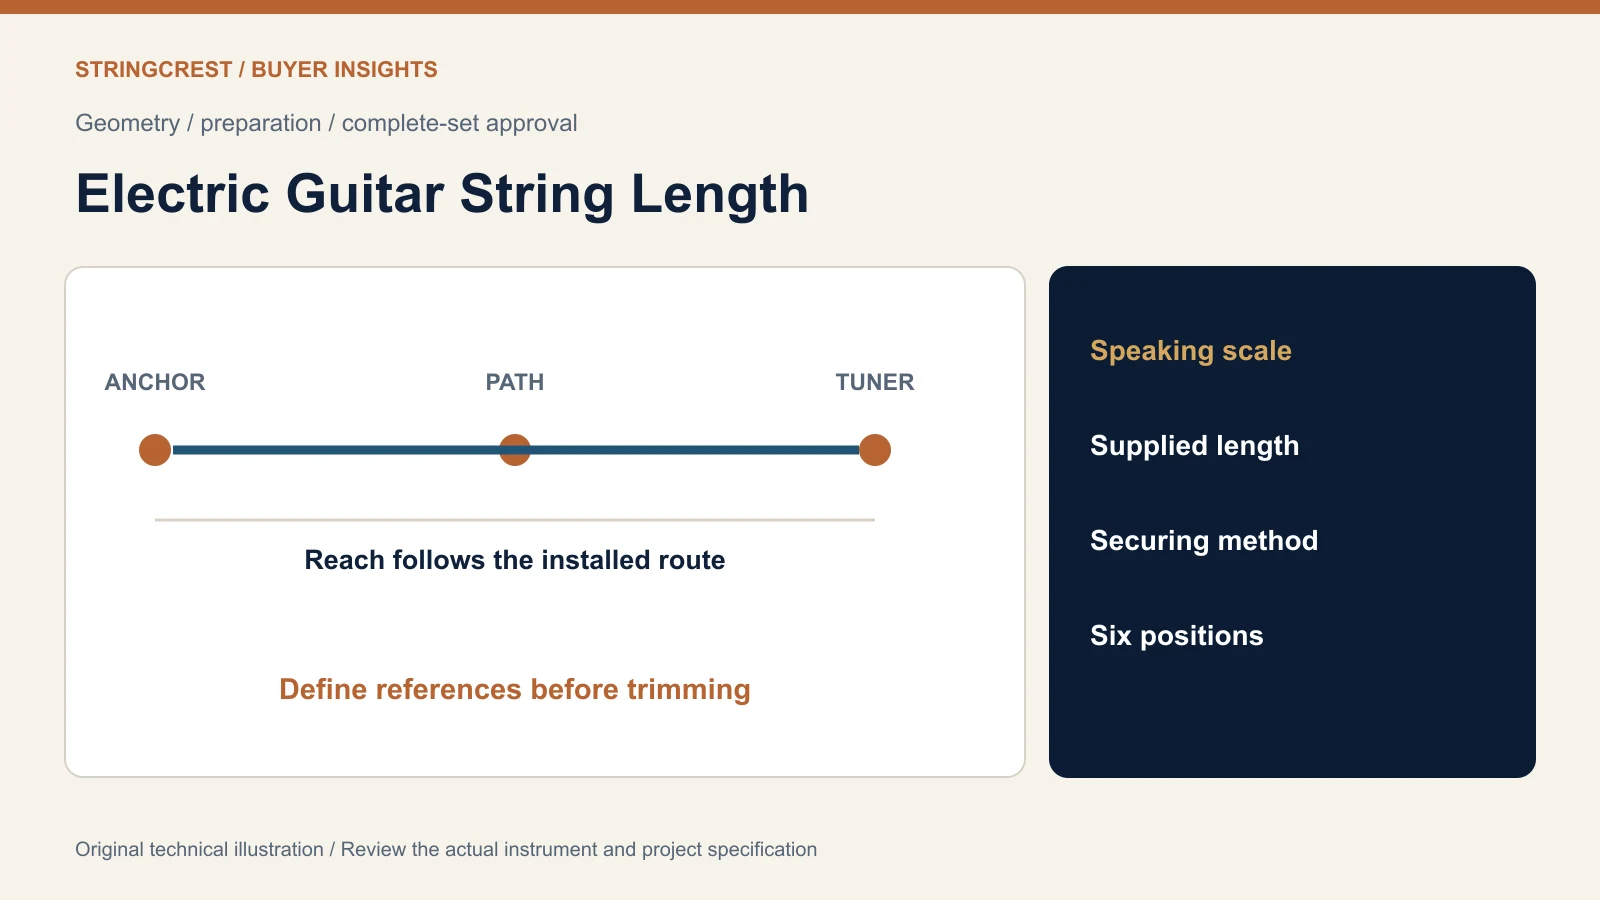
Separate playing scale, supplied length and tuner allowance, then document complete-set fit on the intended electric guitar.
Introduction
An electric guitar string must reach the intended tuner through the instrument’s actual bridge and headstock path, with enough material for the specified attachment method. Scale length alone cannot establish that fit. A locking post, a conventional post and a vintage split post can require different installation preparation, even on guitars with a similar playing scale.
For brands and distributors, this makes string length a specification issue rather than a sentence to add after choosing gauges. A set can have the desired gauge sequence and still create avoidable installation problems if its usable length, end construction or winding transition has not been checked on the intended instrument. “Long enough for electric guitar” is too vague for a purchasing record.
This guide explains how to turn the search question “How long should guitar strings be?” into a practical B2B fit assessment. It covers measurement references, tuner-specific preparation, sample records and packaging instructions. It does not prescribe one universal cut length, certify compatibility with every bridge or provide a repair procedure for unfamiliar hardware.
Start with the actual instrument and the current instructions for its bridge and tuners. Then define the string and test the combination. StringCrest’s electric guitar range provides a starting point for that discussion; final lengths and configurations require confirmation.
Distinguish the four lengths in a fit discussion
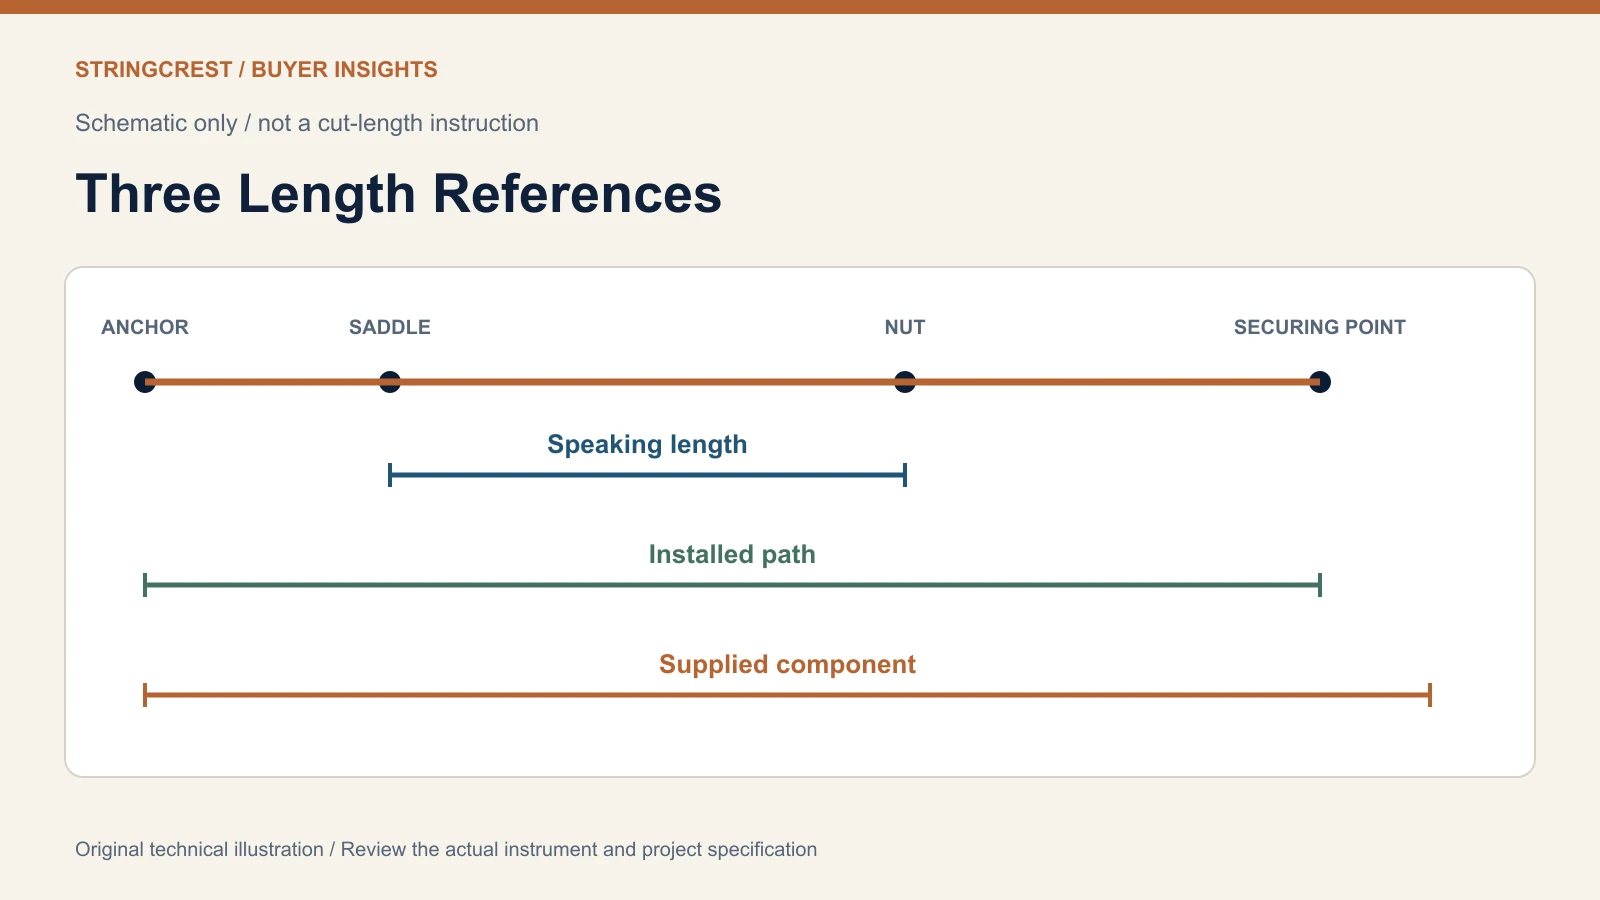
Speaking length
Speaking length is the vibrating section between the relevant nut and saddle contact points. It matters for tuning and tension calculations, but it is not the full length purchased in the packet. Behind the nut and saddle, additional string can pass through holes, a tailpiece, a body or other hardware.
Installed path
The installed path follows the string from its anchor to the point where the tuner secures it. Measure along that route rather than using a straight line across a photograph. A string-through-body path and a top-loading bridge can consume different amounts outside the speaking section. Reverse or unusually long headstocks also change which position needs the greatest reach.
Supplied length
Supplied length describes the uncut component. The buyer and supplier should agree where the measurement starts and ends, including how the ball end or other anchor is treated. A number without reference points can appear precise while remaining impossible to compare between samples.
Installation allowance
Installation allowance is the extra material needed for the particular securing method and preparation sequence. Conventional wraps, a locking clamp and a split-post insertion should not inherit the same instruction automatically. The allowance should come from the hardware procedure and a successful installation record, not a rule recalled from another instrument.
Build a position-by-position instrument worksheet
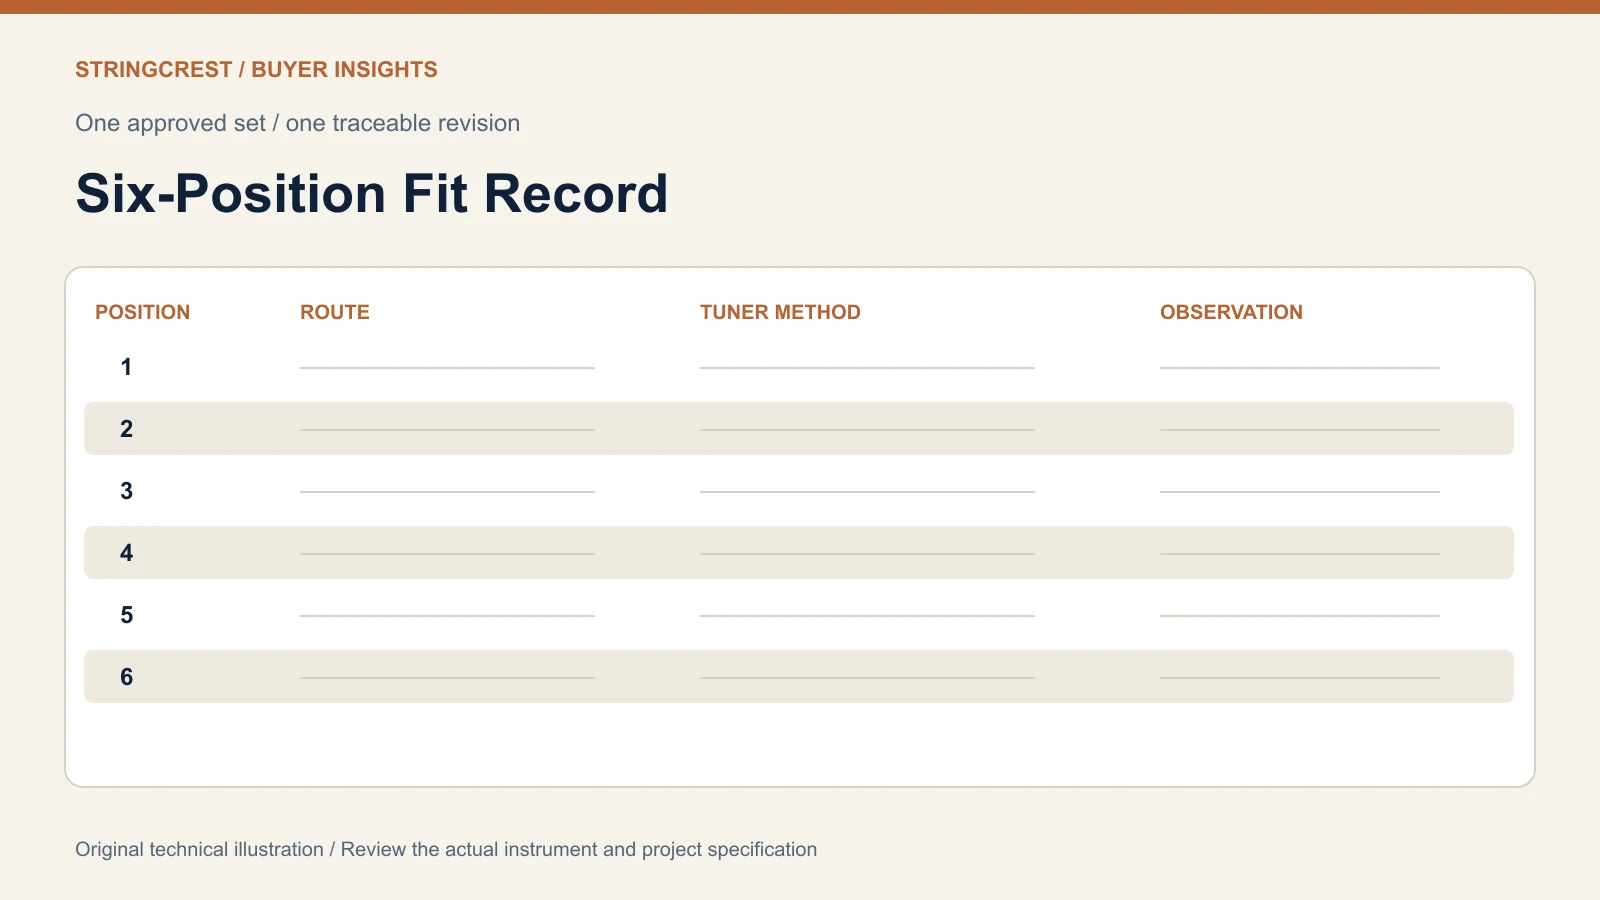
Record the guitar model or reference specimen, bridge loading route, tuner design, string positions and intended tuning. Photograph identifying hardware details before removing strings. A note such as “six-in-line” is helpful, but it does not replace the model and installation method: post height, hole position and locking mechanism can differ.
For each position, identify the anchor reference and the tuner securing point. Measure the path with a suitable flexible reference where necessary, avoiding sharp bends that do not exist in service. Ask a competent technician to interpret uncertain contact points. The purpose is to document geometry, not to force a test string around inappropriate hardware.
| Worksheet field | What the buyer records | Why it matters |
|---|---|---|
| Instrument reference | Model, specimen and hardware revision | Prevents a later guitar change from looking like a string defect |
| String position | Position number and intended pitch | Links fit observations to the right component |
| Anchor reference | Defined start of the measurement | Makes supplied lengths comparable |
| Routing | Top-load, through-body or another confirmed route | Accounts for material outside the playing scale |
| Tuner procedure | Conventional, split-post or specific locking design | Determines preparation and securing requirements |
| Installed observation | Fit, transition location and attachment result | Establishes what the sample actually demonstrated |
The longest requirement is not necessarily the lowest-pitched string. Map the headstock instead of assuming the position order. Save the worksheet beside the complete gauge sequence so purchasing cannot approve the length independently of the strings that were fitted.
Use the hardware maker’s installation method
Fender’s setup instructions distinguish locking, conventional and vintage tuning keys. The useful lesson for a wholesale brief is that attachment methods require different preparation. The page describes particular hardware and should not be converted into universal cut-length instructions for every guitar.
A locking tuner normally secures a string with a mechanism at the post. That does not mean every locking design operates identically. Schaller’s M6 Mini instructions, for example, describe a specific TopLocking arrangement. A rear-thumbwheel instruction should not be copied onto a different top-locking product merely because both are sold as locking tuners.
In the worksheet, record the actual procedure source and the part variant. Separate “the string reached the hole” from “the string was secured and tuned correctly.” Fit approval needs both. Do not overtighten a clamp to compensate for a mismatch or treat uncertain installation behavior as a material-quality conclusion.
Keep winding transitions clear of critical contact points
For wound strings, total length is only part of the specification. The relationship between full-diameter winding, any taper or transition, and the instrument’s contact points also matters. Ask the supplier to identify the relevant construction features and explain which measurements it can provide.
A transition that lands unexpectedly near a nut, saddle or securing point deserves investigation. It may affect how the string seats or how the intended part of the construction is supported. The correct response is to compare the sample with the agreed drawing and hardware requirements; it is not to assume that any visible transition is defective.
Record these features on the installed sample before removing it. Once a string is cut and coiled again, the relationship to the instrument can become harder to reconstruct. Photographs with clear position labels and an agreed reference help preserve that evidence.
Compare complete sets rather than a single convenient string
A supplier may demonstrate one position successfully while another reaches a different tuner, uses a thicker wound section or follows a longer bridge route. Approve the whole set on the reference guitar. Include any planned alternative gauges and hardware combinations in a separate compatibility matrix.
If several guitar models share one private-label set, list them individually. A sample fitted to one model provides evidence for that installation, not automatic coverage of a dealer’s entire catalog. Start with the most demanding measured route and then inspect the remaining combinations. Define the scope that was actually evaluated.
Also distinguish a fit failure from a setup observation. New gauges can change the feel and setup requirements. A string that reaches and secures correctly may still require a professional setup assessment. Record those issues separately so the purchasing team does not solve an action problem by changing supplied length.
Write a length specification that purchasing can reuse
The specification should name the set revision and every position. Include the gauge sequence, plain or wound construction, end type, agreed length references and any identified transition requirements. Where dimensional tolerances are needed, obtain the supplier’s proposed method and capability before agreeing them. This guide does not supply a production tolerance.
Use one unit convention throughout the controlled record. If the document includes both millimeters and inches, decide which value governs and calculate the other consistently. Avoid making an approximate conversion look like an independently measured requirement. Drawing revisions should travel with the measurement sheet.
Ask what will be inspected before shipment: the measuring fixture, sample conditioning if relevant, position identification and handling of a nonconforming result. “Length checked” is weaker than a record that specifies the measurement references. A factory testing plan is useful when its method answers the approved drawing.
Plan an installation sample without destructive guesswork
Preserve the original identification
Keep the packet, set code, lot reference if supplied and position labels. Before cutting, note which string came from which envelope. Otherwise, a mistakenly assigned position can produce a misleading fit complaint. Use a sample log rather than relying on the discarded packaging.
Follow a deliberate preparation order
Review the hardware instructions first, then fit and secure the string according to that procedure. Some methods involve preparation before insertion; others secure the string before the free end is trimmed. There is no benefit in imposing one cutting sequence on incompatible tuner designs.
Record the end condition
Note fraying, loosened winding, clamp marks or damage without assuming the cause. Keep installation handling separate from the as-received condition. If a cut or bend has altered the sample, describe it accurately. A photograph taken after installation should not be presented as proof of what arrived untouched.
Stop when the procedure is unclear or the string does not engage correctly. Repeated clamping or aggressive retuning can destroy the evidence needed to understand the mismatch. Obtain an appropriate technician’s assessment before continuing an uncertain installation.
Make dealer instructions specific and short
An outer packet has limited space. It should identify the instrument family, set configuration and a reliable route to the applicable installation information. A QR code or link can support a controlled instruction sheet, but the destination must remain available after the packaging is printed.
Avoid a universal statement such as “cut two tuner posts beyond the hole” unless that direction has been approved for the specified hardware. Distance between posts varies, and a useful instruction on one conventional headstock can be unsuitable for a locking or split-post system.
A better dealer note tells the installer to follow the tuner maker’s procedure and check the intended instrument fit before trimming. If your project has model-specific instructions, give them a revision and scope. Dealers should be able to tell whether a document applies to the guitar in front of them.
Keep length claims separate from tuning-stability claims
A successful reach test does not prove long-term tuning stability. That outcome can involve the bridge, nut, tuner mechanism, installation, setup and playing conditions. Describe what the fit sample established without expanding it into a performance guarantee.
For a controlled comparison, define the intended observation period and use equivalent hardware and preparation. Record the instrument’s tuning before and after the chosen application sequence, along with interventions such as retuning or setup changes. Treat the resulting record as evidence under those conditions rather than a promise for all users.
This distinction is helpful during product application reviews. It lets the buyer approve a string’s geometry while continuing to investigate a different concern. It also prevents a broad “locking tuners compatible” label from hiding untested variants.
Use a clear exception process at receiving
If a delivered string appears too short, first compare its position identity and reference measurements with the approved master. Preserve unused affected samples and their packaging. Check whether the instrument or hardware differs from the approved reference before classifying the issue.
A distributor’s receiving report should separate the supplied component, the installation attempted and the observed result. Include photographs that show the actual path and measurement references. “Does not fit” alone leaves the supplier guessing whether the problem is reach, taper, end type, mislabeling or attachment.
Agree how affected stock will be held while the review proceeds. Do not silently substitute another gauge or mix envelopes from different set revisions to make a customer installation work. That can create a second specification problem and remove the traceability needed for a fair assessment.
FAQ
Is guitar scale length the same as string length?
No. Playing scale describes the vibrating section. Supplied length must also accommodate the route outside that section and the tuner’s preparation method. A purchasing brief should define both instead of using the words interchangeably.
Do locking tuners always need less supplied string?
A locking procedure may require less wrap allowance than a conventional one, but total reach still depends on the guitar. The relevant model’s instructions and measured path determine fit. The tuner label alone does not establish a finished cut length.
Can one set fit every six-string electric guitar?
That claim needs a defined and tested scope. Different bridges, routes and headstocks can change requirements. A brand should publish a compatibility statement that matches the instruments and hardware combinations actually evaluated.
Should wound strings be cut before installation?
Follow the string and hardware makers’ instructions for the actual construction and attachment method. Do not transfer a cutting rule between different core designs or post mechanisms without confirmation. Preserve sample identification throughout the process.
Does a successful fit test prove stable tuning?
It demonstrates the installation observed, not universal stability. Keep geometry approval separate from a defined performance evaluation involving setup, hardware and playing conditions. Both can be recorded in the same project without treating them as identical evidence.
What should an OEM buyer send for a length review?
Provide the complete set, intended tuning, bridge route, tuner model, reference guitar, measurement start and end points, and position photographs. Include the approved revision if the question concerns a reorder or delivered shipment.
Conclusion
Electric guitar string length becomes manageable when the buyer separates speaking scale, installed path, supplied component and attachment allowance. The next step is a six-position record on the intended instrument, following its actual tuner procedure and preserving the final specification revision.
That approach reduces ambiguous RFQs and gives receiving teams useful evidence when a fit question arises. It supports a focused compatibility statement without converting one sample into a claim about every guitar or every locking tuner.
For a new brand range or a revised installation brief, explore electric guitar strings and Send Your Requirements. Include instrument and hardware references so the discussion can begin with the relevant fit conditions.
Sources and interpretation limits
- Fender setup and tuning-key instructions provide model-specific installation context. Their numeric adjustments and cut directions are not adopted as universal requirements here.
- Schaller M6 Mini and TopLocking instructions illustrate why the exact locking mechanism matters.
The measurement worksheet, approval sequence and receiving recommendations in this article are proposed buyer practices. They are not StringCrest test results, certified compatibility statements or a substitute for the relevant hardware instructions.
FROM GUIDE TO PRODUCT
Connect this guide to Electric Guitar Strings.
Review the relevant range, then bring the instrument, complete specification and open questions into one project brief.
YOUR PRODUCT · YOUR BRAND
Discuss your next string project with Frank.
Share your instrument category, target market, gauge or material direction and private-label packaging requirements.

ABOUT THE AUTHOR
Frank Zou
Frank works directly with musical-instrument brands, importers and distributors on string specifications, product selection and private-label project requirements.
Meet Frank